How to hang a staircase gallery wall (without measuring every step)
By the Storytiles team in Cape Town · Updated 2 November 2026
Short answer
Hang staircase photos so they climb with the stairs: keep the centre of each frame about 145-150 cm above the step below it, use the same 5-8 cm gap between frames, and start from the bottom step. A pre-planned staircase layout of peel-and-stick tiles skips the measuring and means no hammering on a ladder.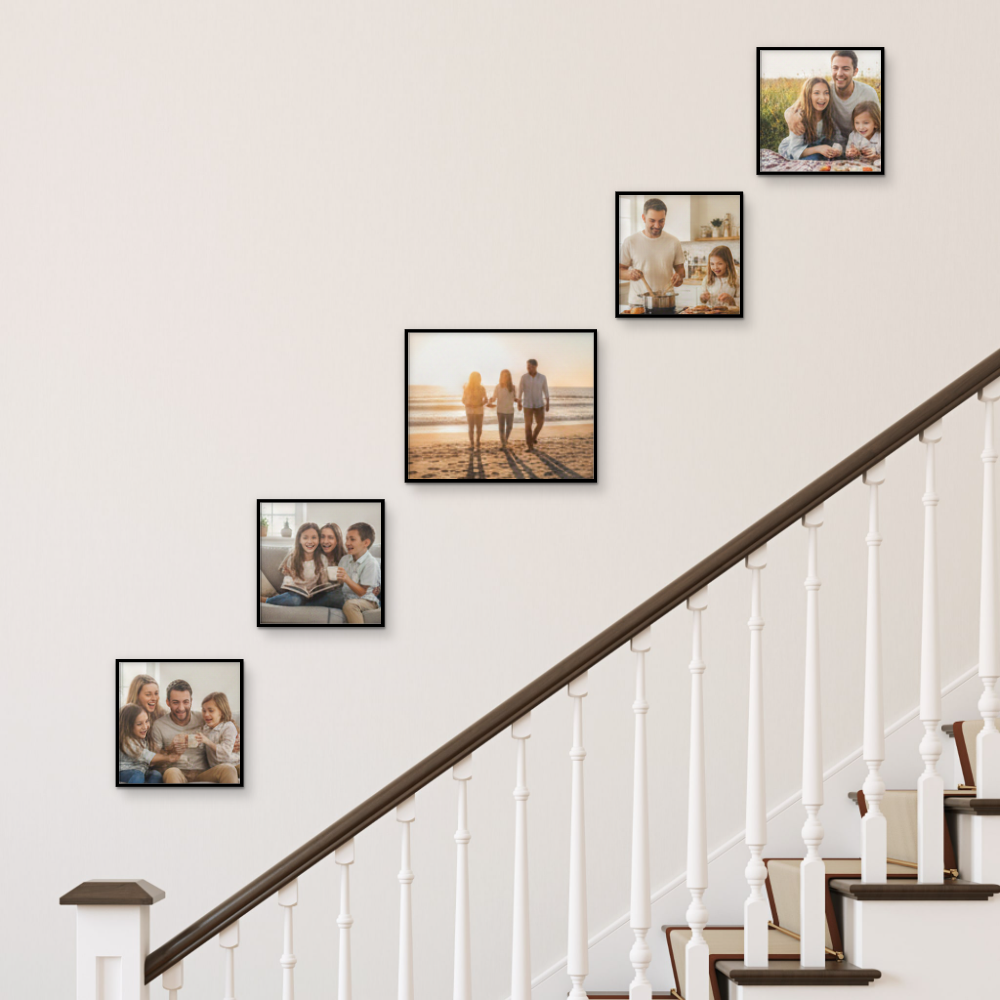
A staircase wall is the perfect gallery: everyone walks past it every day, and it's tall enough for a whole family story. The tricky part is getting the frames to climb with the stairs instead of looking like they're sliding off. Here's the simple rule.
How high should staircase pictures hang?
Keep the centre of each frame about 145-150 cm above the step directly below it. That's normal eye level, measured from where you're standing. Because each step is higher than the last, your frames naturally rise in a diagonal that follows the stairs.
- Find the step under where each frame will go.
- Measure 145-150 cm up from that step and mark the centre point.
- Line the marks up with string or painter's tape to check that the diagonal is even.
How far apart should the frames be?
The same gap everywhere, usually 5-8 cm. Uneven spacing is what makes a staircase wall look accidental.
Which layouts work on stairs?
- A rising row: frames stepping up one by one, parallel to the handrail. Clean and modern.
- A staircase block: pairs or trios that each step up together. Fuller and more gallery-like.
- A scattered climb: mixed sizes inside an imaginary diagonal band. Relaxed, collected look.
Pre-planned layouts do the stepping for you, so there's no maths on a ladder:
Stairway Spectacle
5 tiles in a staircase pattern
R2 179,99
Start styling
Step-up Splendor
5 tiles in a mixed staircase pattern
R2 299,99
Start stylingWhat should go on the staircase wall?
The stairs are made for a story you read as you walk. Ideas that work:
- A timeline: the kids from bottom (babies) to top (now).
- Generations: grandparents at the bottom, the newest family at the top.
- One trip, start to finish: a holiday told in five photos.
- A matching AI family portrait set as the centrepiece, with real photos around it.
How do you hang it safely?
Ladders on stairs are where accidents happen. Peel-and-stick photo tiles mean no hammer and no drilling: wipe the wall, press each tile for a few seconds, step back, and adjust. Wait 7 days after painting, and if your stairwell is face brick, read our guide to hanging pictures without nails first.
Quick checklist
- Pick 5-9 photos that tell one story.
- Mark centres 145-150 cm above the step below.
- Keep 5-8 cm between frames.
- Start at the bottom and work up.
- Step down to the bottom stair and look up - adjust before you're done.
Frequently asked questions
How high should pictures be on a staircase wall?
Keep the centre of each frame about 145-150 cm above the step directly below it. Because the steps rise, the frames rise with them in a diagonal line.
How far apart should staircase frames be?
Keep the same gap between every frame, usually 5-8 cm. Equal gaps matter more than the exact number.
How many pictures do I need for a staircase?
For a standard straight staircase, five to nine frames usually fill the wall nicely. A layout of five tiles in a staircase pattern is a good starting point.
Is it safe to hang pictures above stairs without nails?
Peel-and-stick tiles are often safer - there's no hammering on a ladder over the stairs. Stick them on a clean, smooth painted wall and press firmly.
Ready to fill your wall?
Peel-and-stick photo tiles, made in Cape Town, with free delivery across South Africa.
Browse all styles